 When I mentioned last week that I had created a custom Google map for my upcoming Paris trip, a reader named Cara asked for a tutorial – so here it is! At first I was pretty intimidated by the My Maps feature on Google and didn’t understand how to use it – when you first open it it can look a little daunting. I’m excited to share this tutorial because it’s actually so easy once you figure it out.
The reason I like a custom Google map is because when you’re traveling, you obviously have lots of stuff you want to do, but a limited amount of time in which to do it all. By creating a map that tags all of the things you want to see and do, it makes it so much easier to plan your days and avoid 1. wasting time, or 2. walking right near something you wanted to see but missing it because you didn’t realize it was right there! That would drive me nuts. When you have tons and tons of things you’re planning to do all over a big city, it becomes really hard to keep track of it all – and a custom Google map makes it super easy to keep track of it all.
Once you make a map with all of your want-to-sees and want-to-dos, it becomes really easy to build a loose itinerary and schedule – on Monday, you’ll do all of the things that are clumped in this area, and Tuesday all of the things clumped in this neighborhood, etc.
So here are the step-by-step instructions (and bear in mind, I’m not an expert – this is just how I use it and it works really well for me!).
Create the Map
 1. Go to google.com/mymaps and click on “Create a New Map” at the top left.
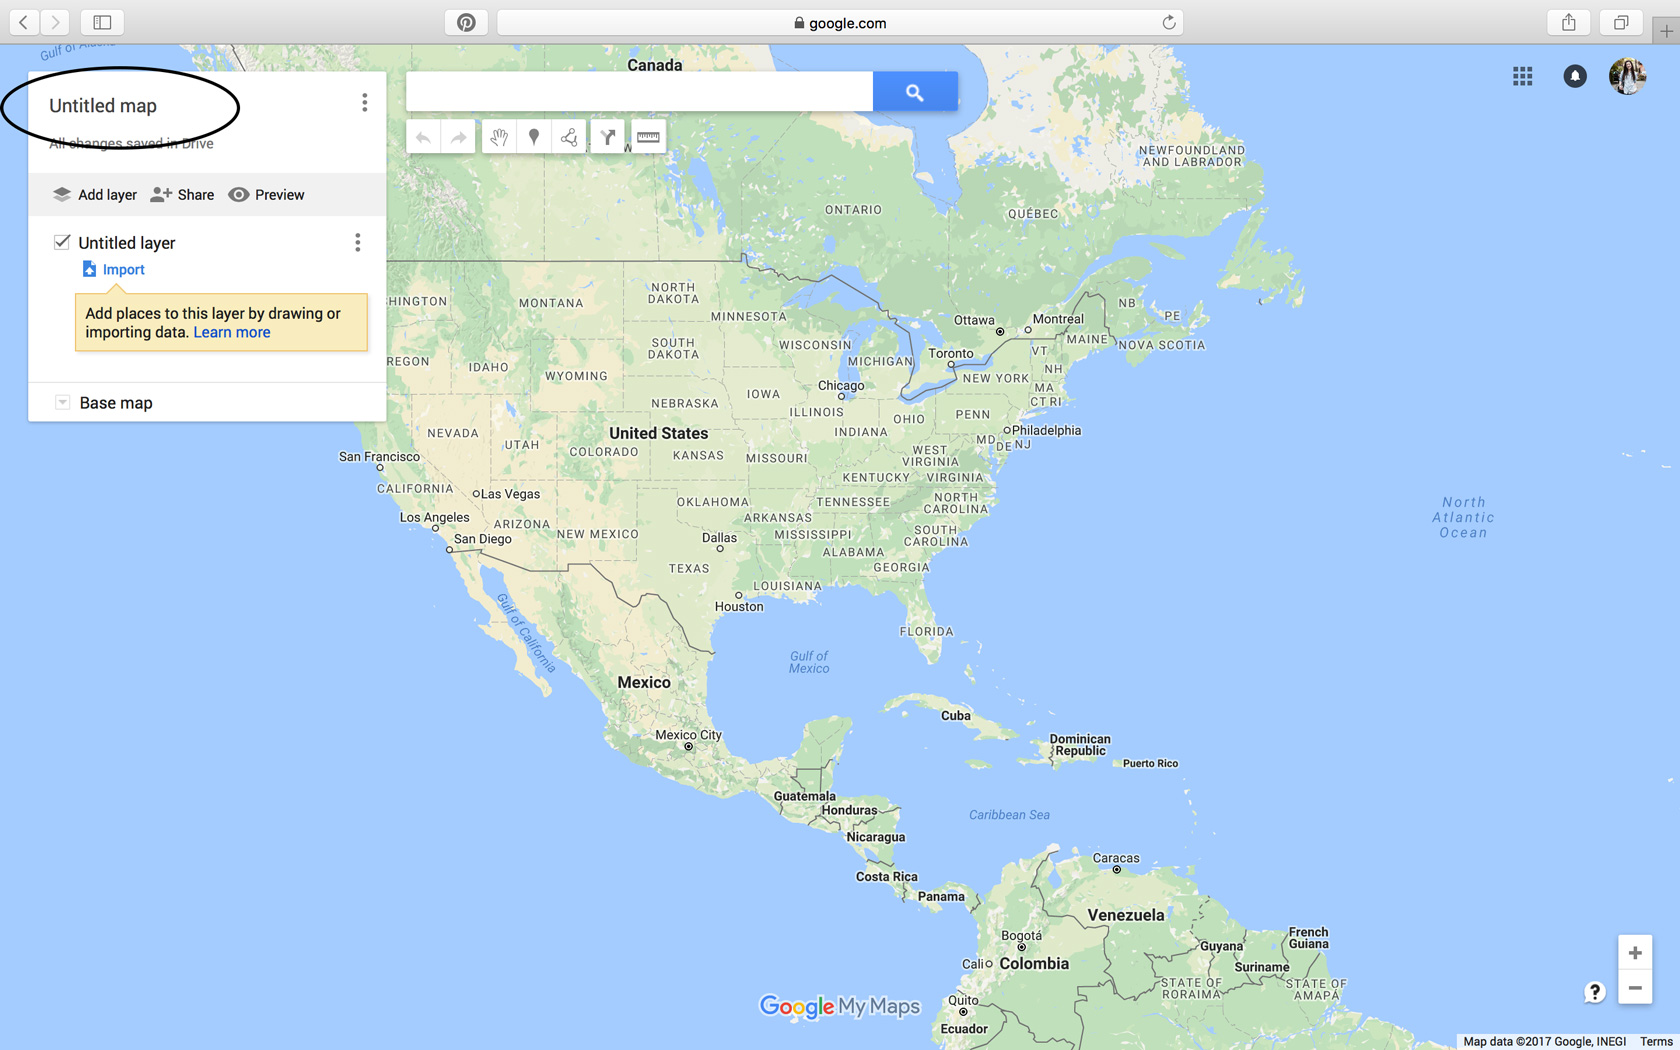
2. Give your map a name by clicking on Untitled Map and filling in a name.
Make Layers
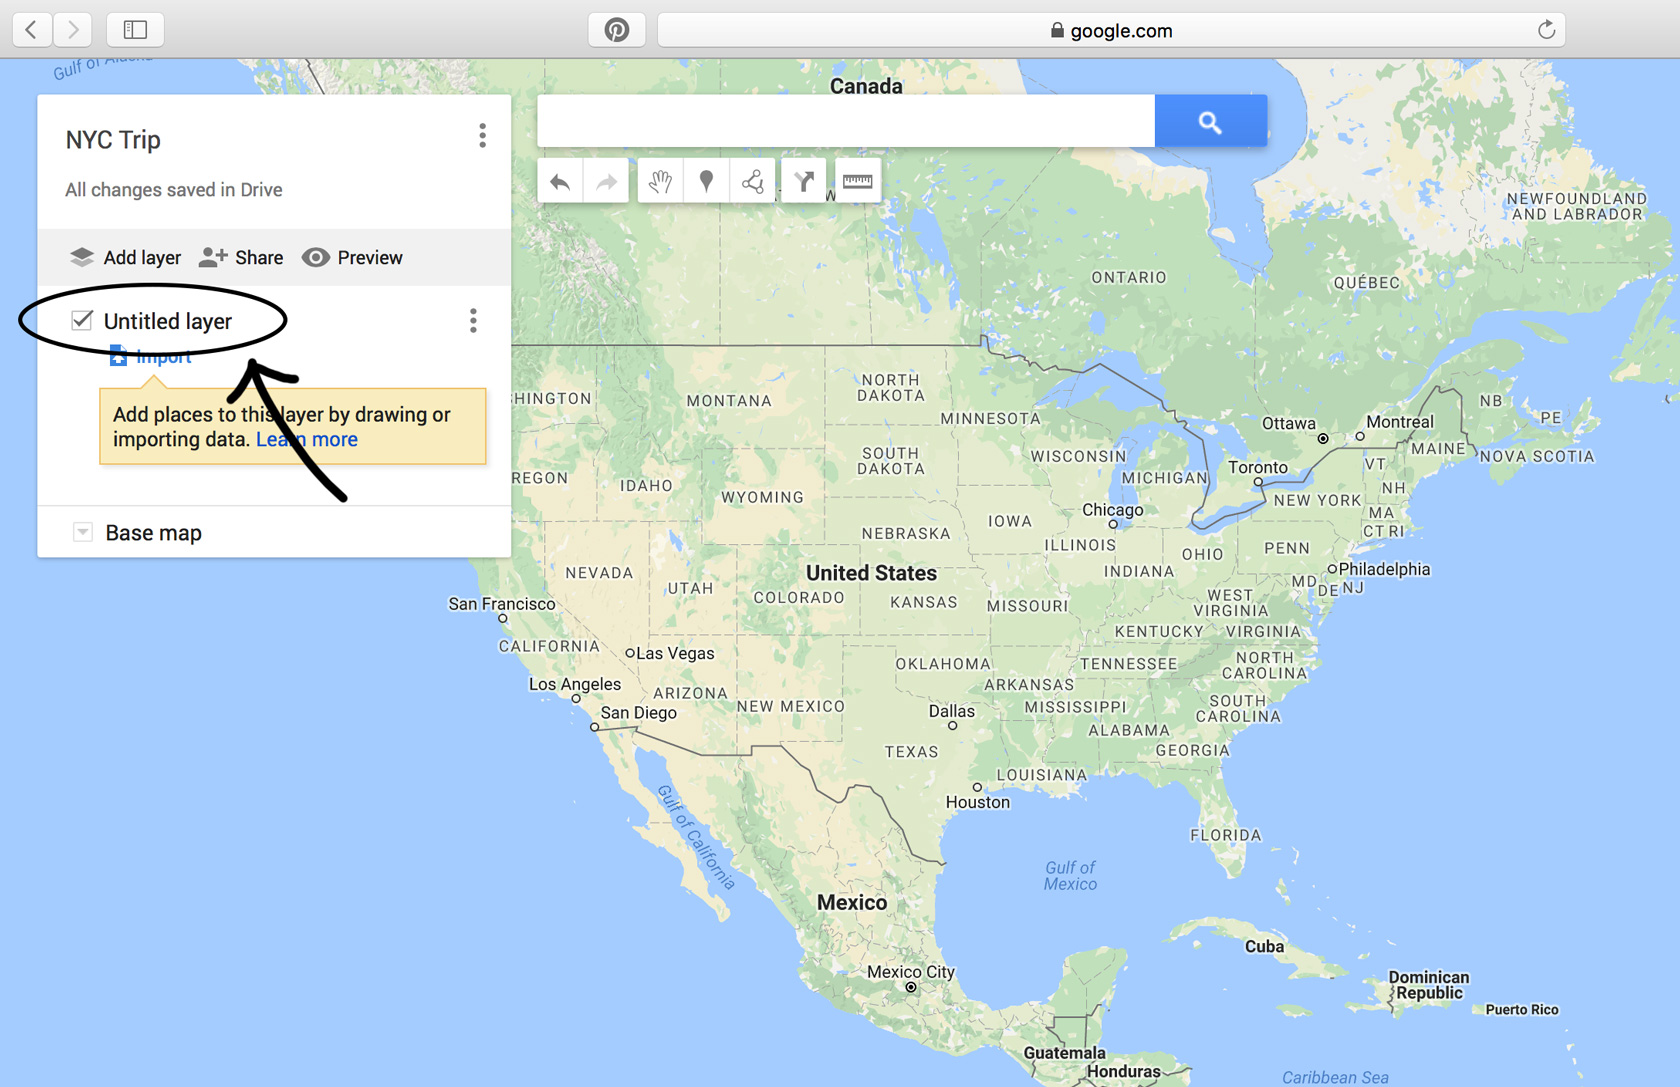 3. First click where it says “Untitled Layer.” Name the layer “Hotel.”
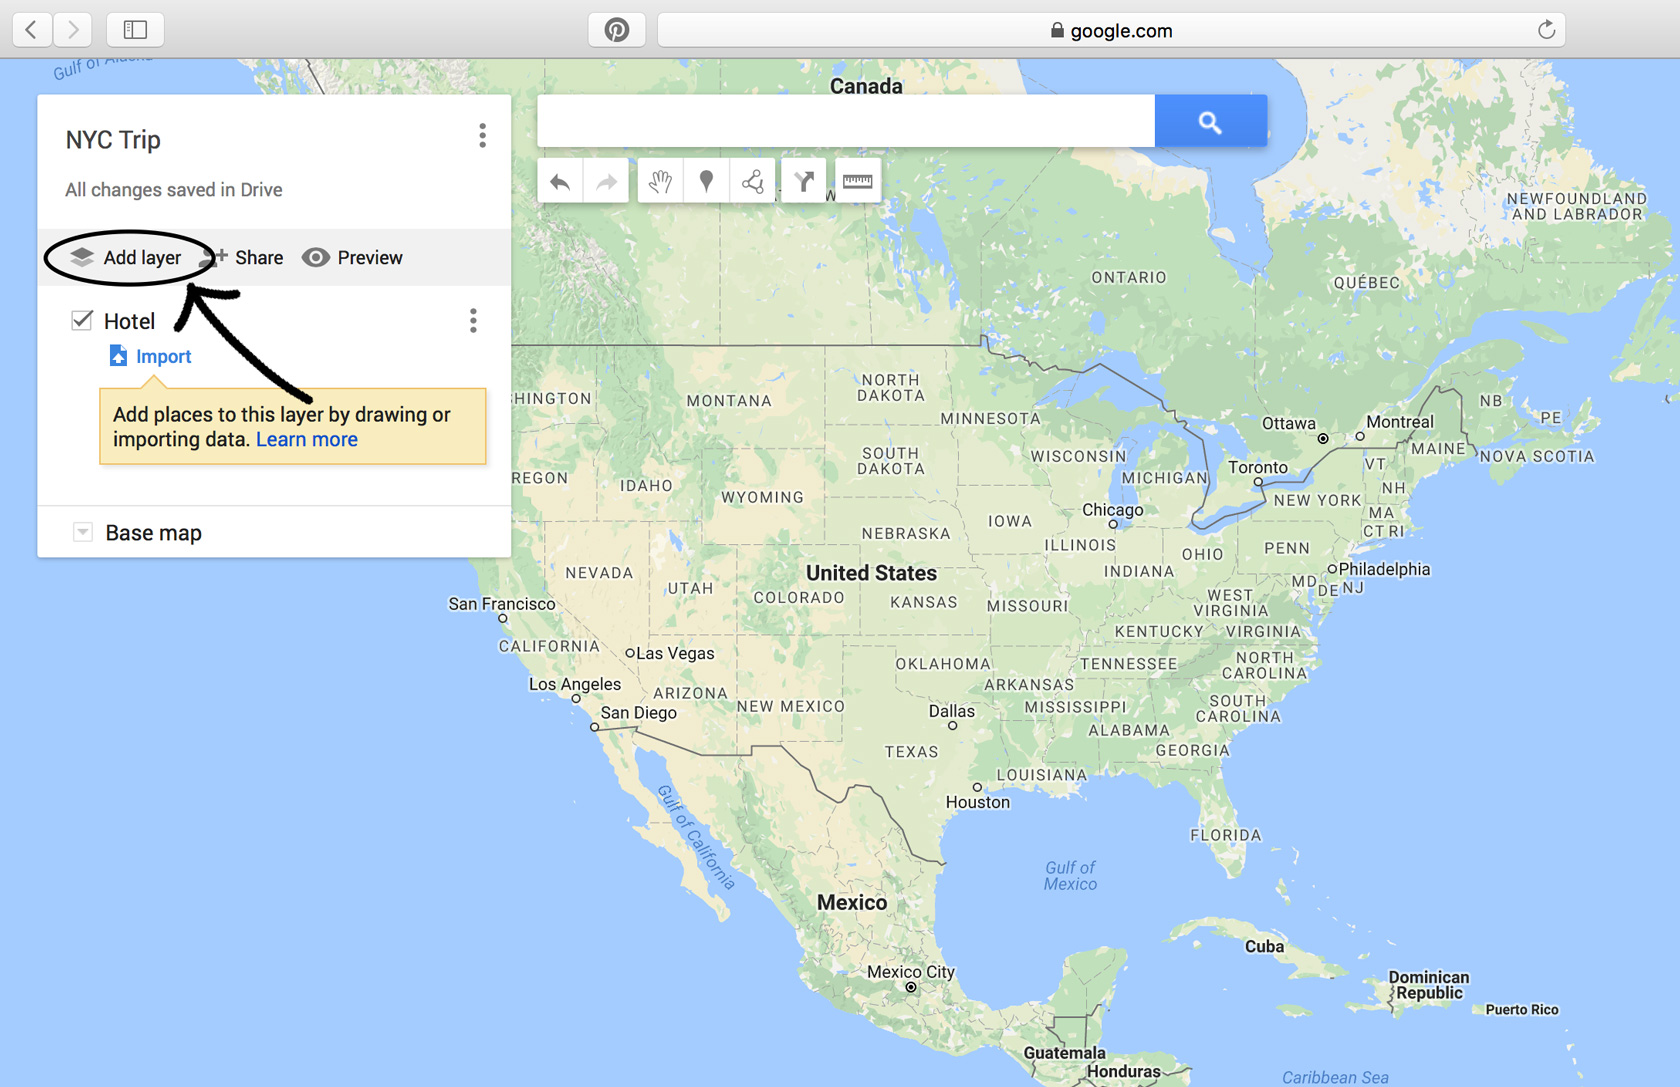 4. Next click on “add layer.” Here is where you can customize based on how you want your map to be organized. You can make Layers by category, such as “Restaurants,” “Parks and Gardens,” “Cafes,” etc. You could categorize your map by days, in which you put all of your activities for each day under that heading. You could categorize by neighborhood – all destinations on the Upper East Side, all destinations in the West Village, etc. You can get as creative and specific as you want – you could make a layer called “Places to Instagram.” I did mine by category so I’ll continue with that example. And don’t worry if you’re confused about what exactly a “Layer” is – it will make sense as you continue.
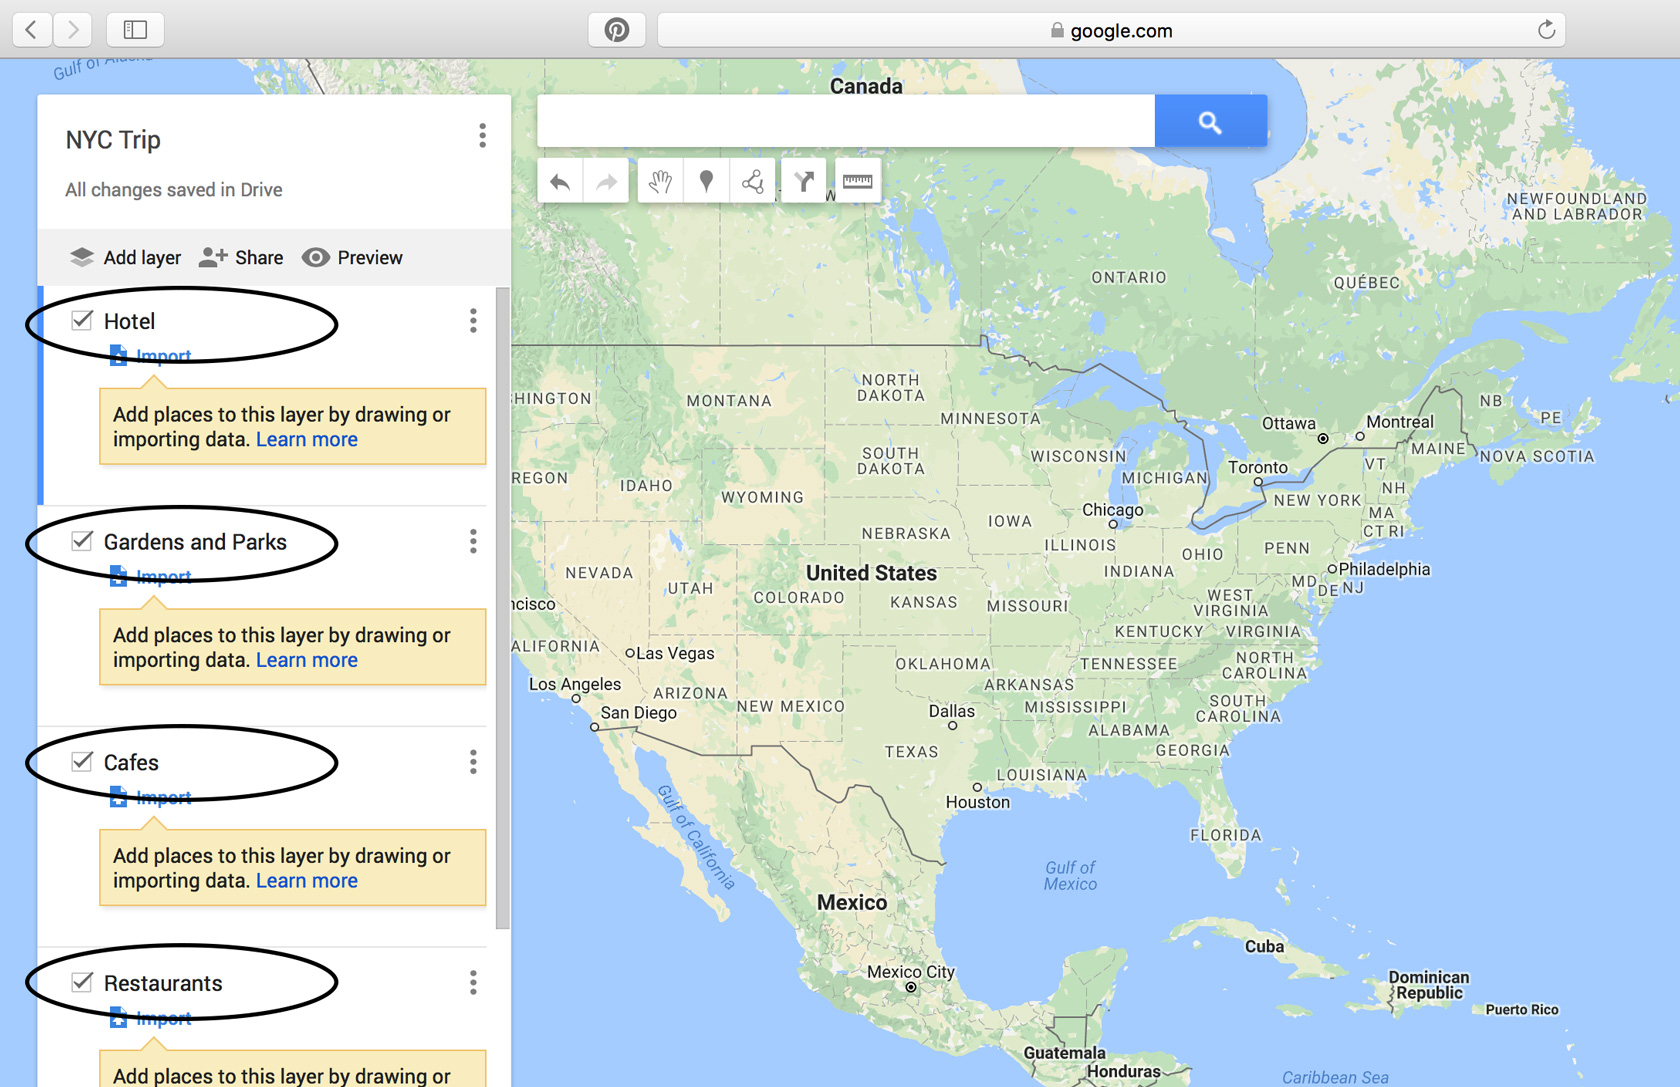
5. So just keep clicking “add layer,” and when “Untitled Layer” pops up, click on that, and name it. Keep going until you have all of the categories you want (and don’t worry about being too thorough, you can easily add and/or remove categories and Layers as you go).
Add Destinations
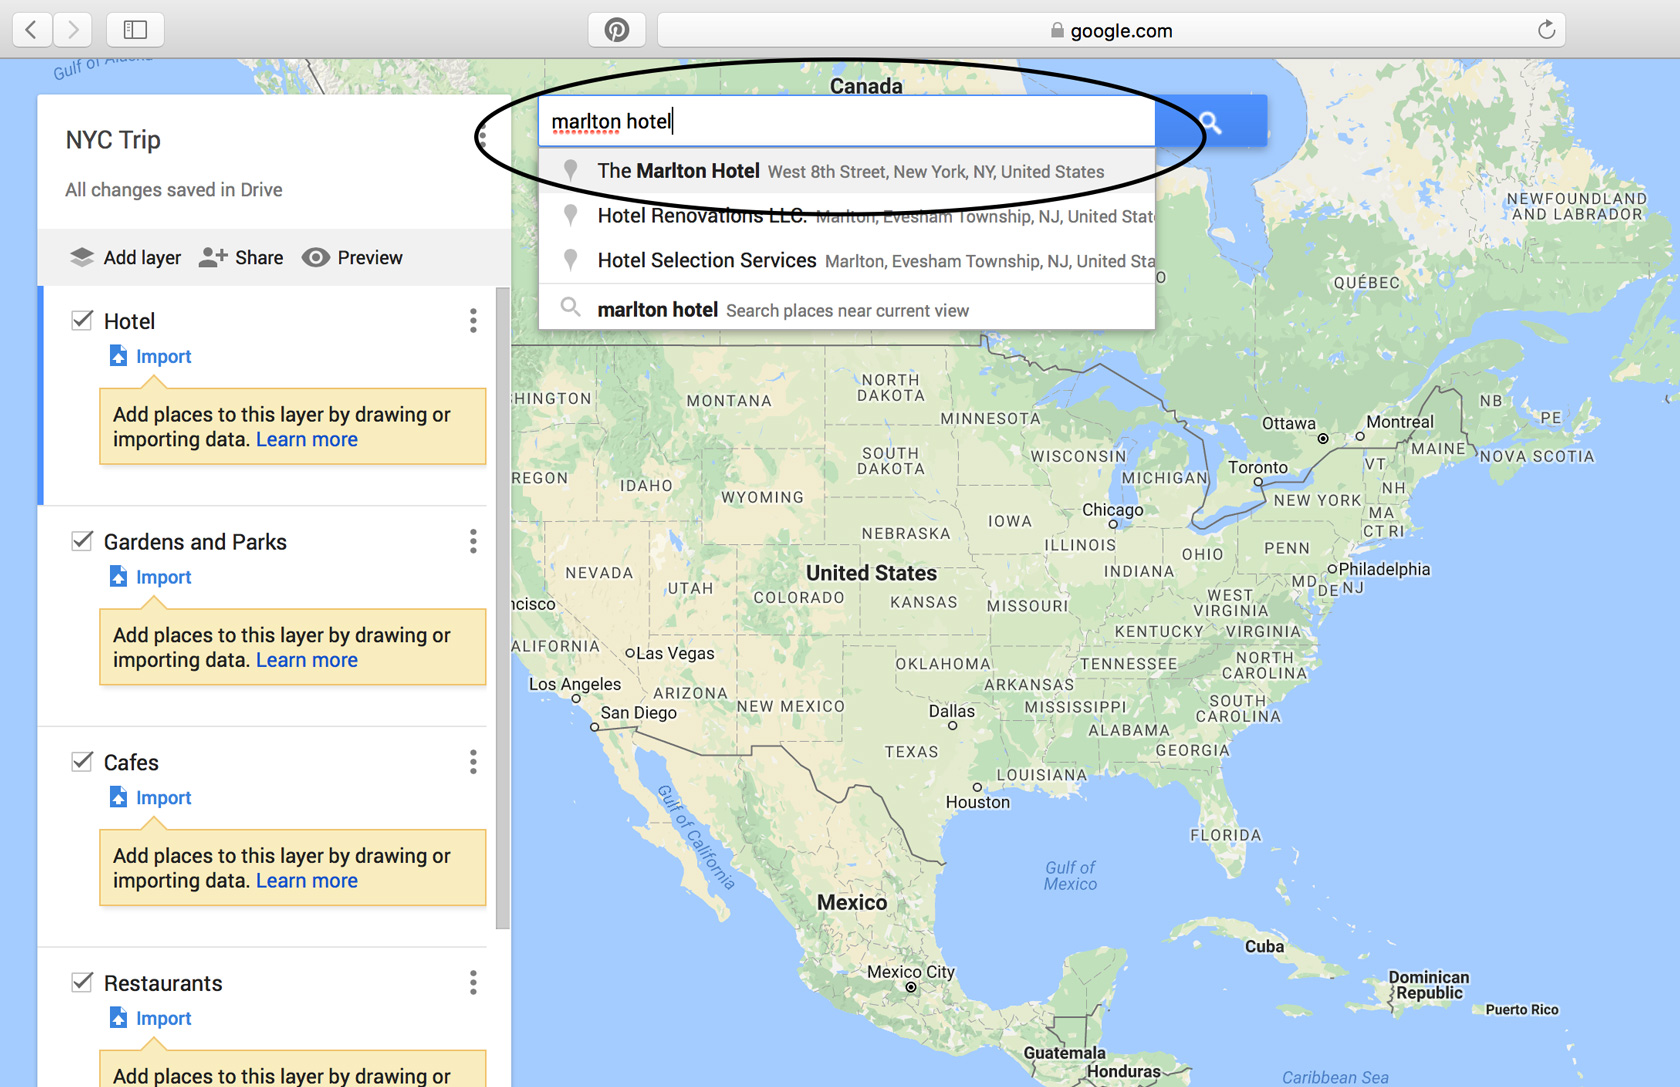 6. Time to start adding destinations. Since our first layer is “Hotel,” (your home base for the trip), add that first. Simply type your hotel name or address into the search bar up top, and it will pop up. Click on it, and the map will zoom in to the destination.
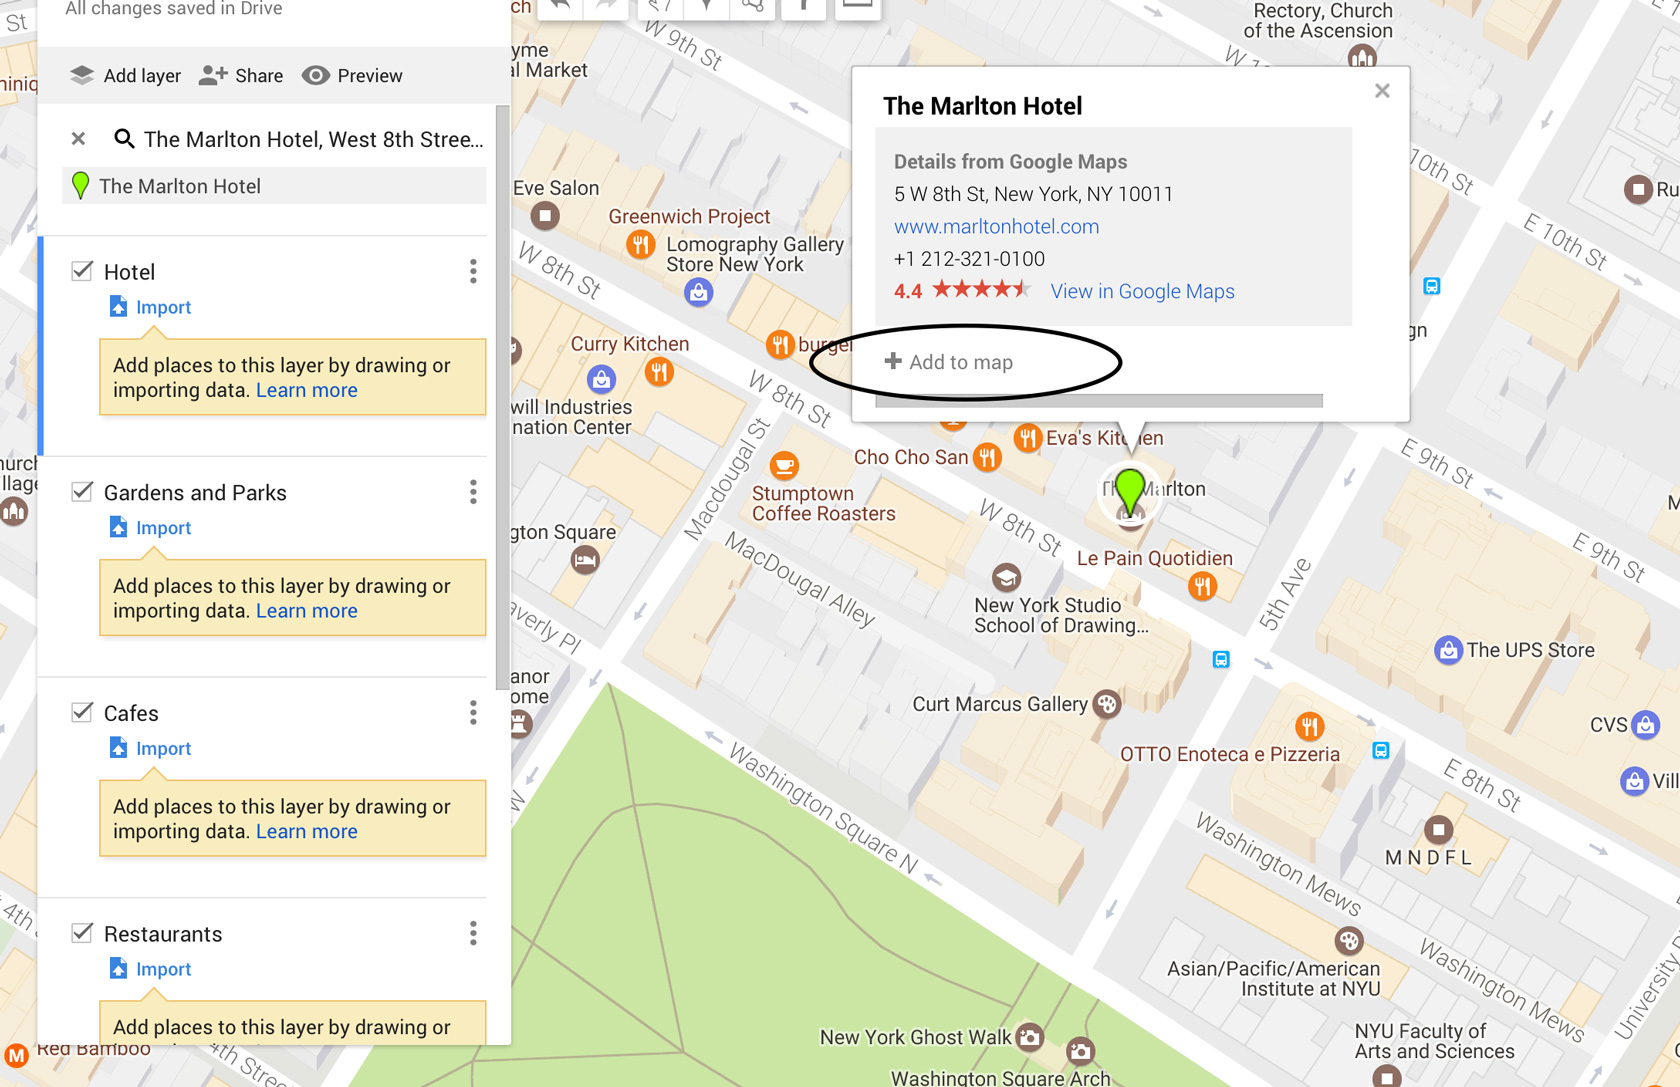 7. As you can see above, the destination (your hotel, in this instance) will show up on the map along with a box which gives info on that place – the address, website link, etc. Click “add to map.”

The hotel will pop into your sidebar under the “Hotel” layer, as you can see above.
8. Keep adding destinations to your map in the same manner, by simply clicking on the name of the Layer you want it under, typing the destination in the search bar, and then clicking “add to map” when the box pops up. If you accidentally forget to hit the correct Layer while adding destinations, it doesn’t matter – you can just drag the destination into the right Layer in the sidebar.
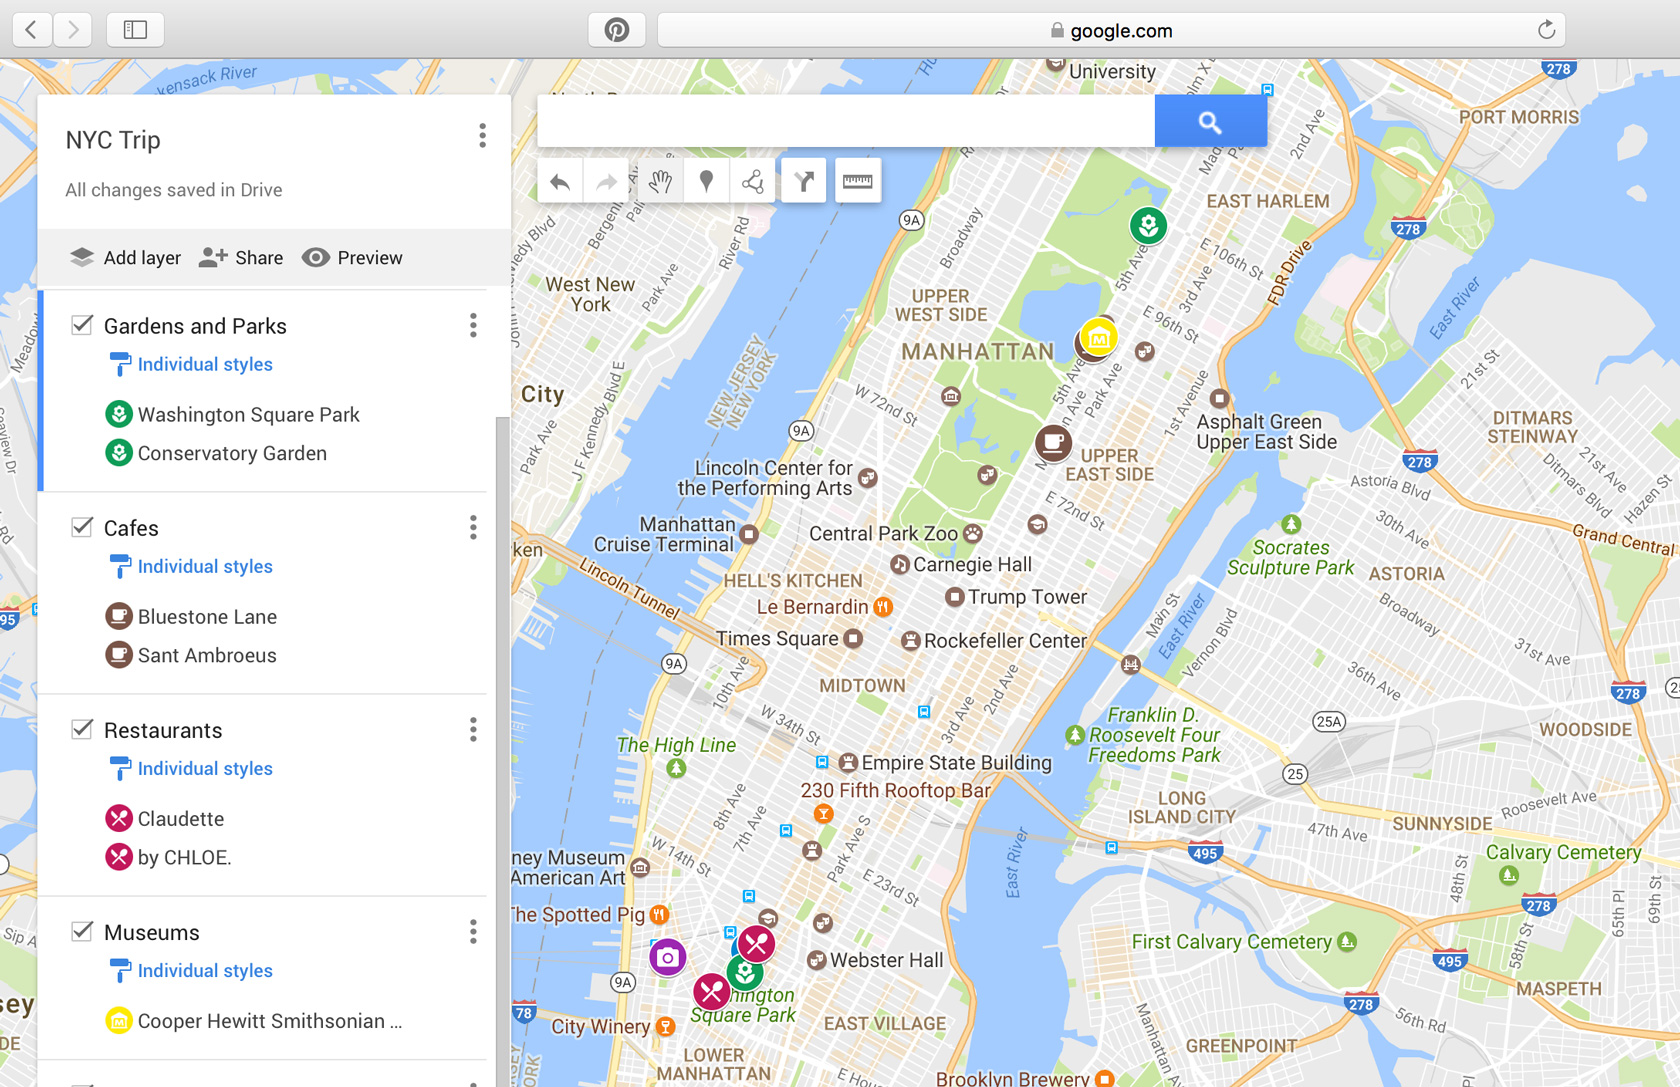
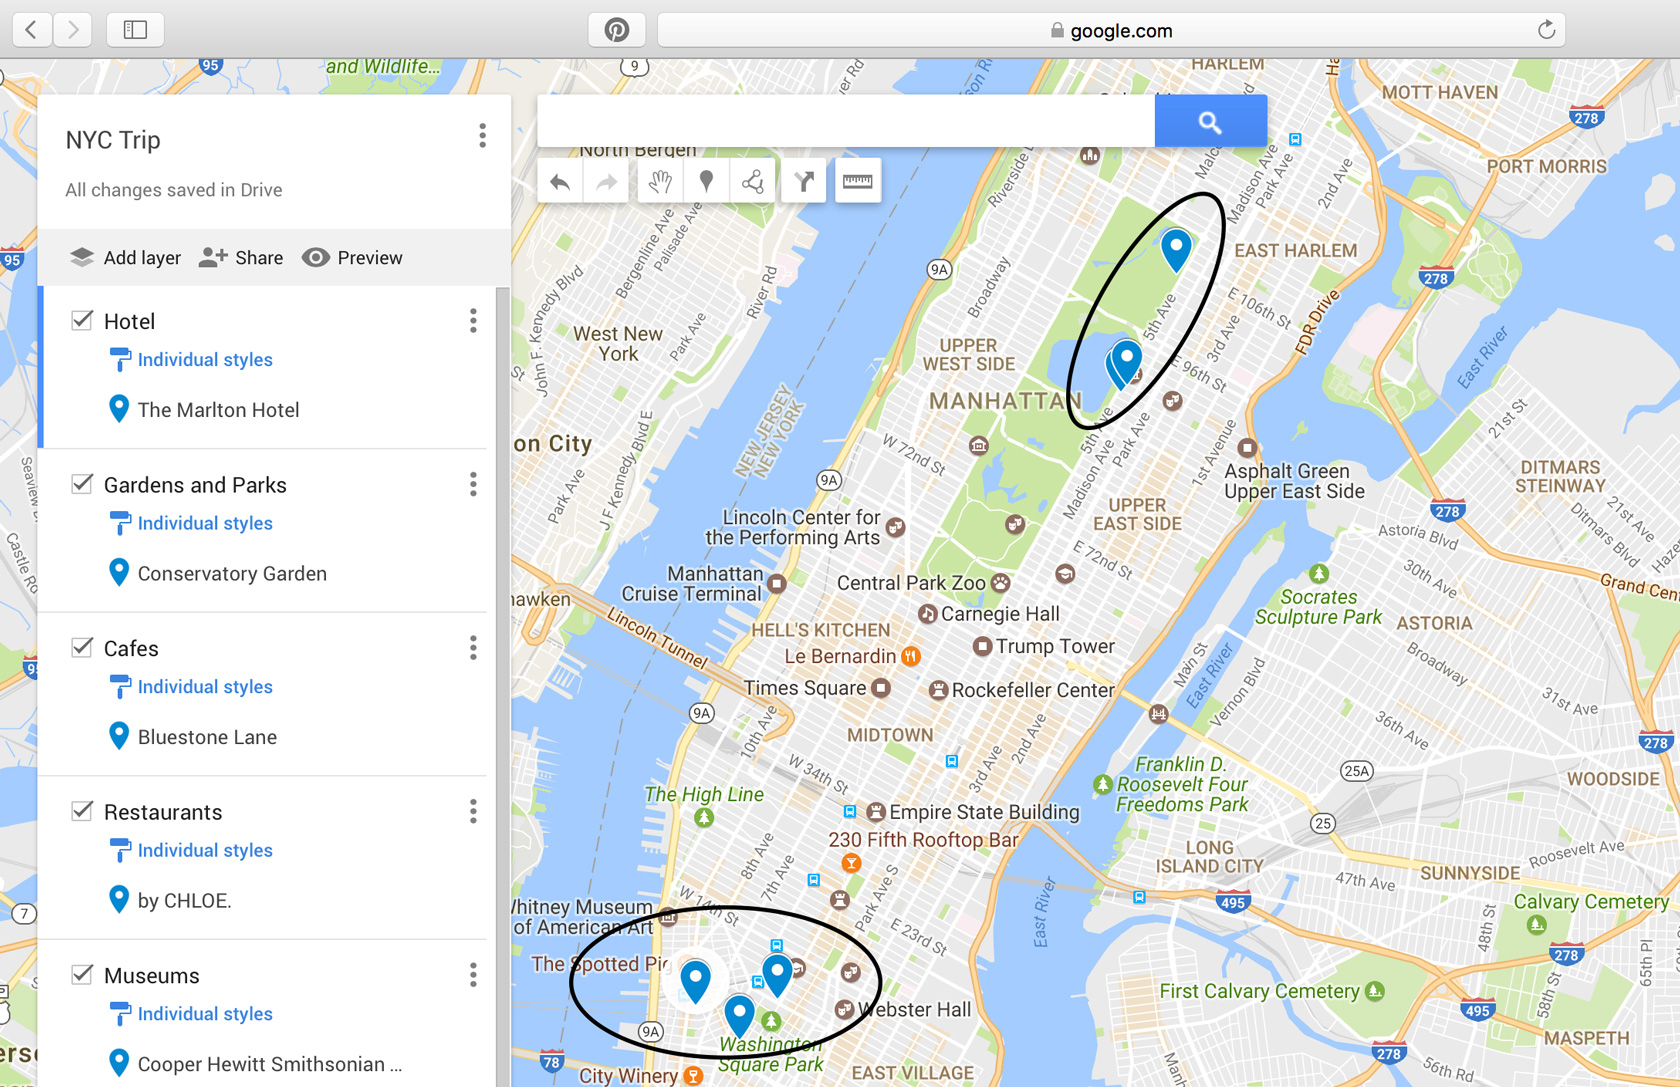 You’ll notice that when you add a destination to the map, in addition to showing up on the sidebar, it drops a little blue pin on the map itself. This is my favorite thing about the custom Google map – now you can see at a glance which things you should group onto the same day, based on what is near what. On the map above it’s obvious that your activities are falling into two neighborhoods that are far away from each other, so it’s clear what activities you should plan to do on the same day. Voila – a perfect way to plan the days out! It’s not a strict schedule, but rather just a loose sense of where you’ll be and what you’ll want to hit up while you’re around there.
Customize with Icons and Colors
After adding your destinations, you’ll wind up with a categorized itinerary of sorts in the sidebar. What I like to do next is customize the icons on the map a little so I can tell what is what with a glance. Currently the icons are blue pins, as you can see both on the map and in the sidebar. ![]()
9. Click on your first destination, your hotel. The detail box will pop up. Click on the little paint can – another box will pop up with colors and icons. Click the first icon (the little house).
![]() Now your hotel is represented by the house icon on both the map itself and in the sidebar on the left. So much easier now to tell what’s what at a glance!
Now your hotel is represented by the house icon on both the map itself and in the sidebar on the left. So much easier now to tell what’s what at a glance!
You’re not limited by the two rows of icons that pop up – simply click “more icons” and a plethora of options will become available. Hover over each to see what it signifies. If you can’t find the icon you want, type it into the “filter box” – it should pop up.
 10. To color-code your map, just use the same method for the icons – click on the destination and when the box pops up, just click on whatever color you want to make it. You can make all restaurants blue, all shopping pink, all parks green, etc. You could make all of Monday’s activities blue, all of Tuesday’s activities red…whatever you want.
What I preferred to do regarding color-coding the map was only color the things that are musts for me. So for my Paris map I gave a pink color to a few destinations that for me are must-dos (like Poilane and the rooftop of Printemps). This way they stand out from the rest.
Add Notes onto Destinations
Another cool trick – using that same box that you used to add icons and colors, you can click the little pencil icon to add a note to the destination. I used this on my Paris map to remind myself why I added some of the spots (for example, I put Avenue de Camoëns to my map and added a little note to remind myself that it’s a cul-de-sac with a great view of the Eiffel Tower).
Turn Layers On And Off As Needed
One other thing you can do is turn Layers on and off (like in Photoshop). See the check box in each little Layer box on the sidebar? Just uncheck it and that Layer will be hidden. So that’s where it could be cool to make the Layers days of your trip, and then only turn on one day at a time. Or, you could turn off all extraneous Layers except for restaurants, if you’re looking for a place to eat…the options are endless. You can also make a Layer that is directions from one destination to another, and then turn that Layer on and off as you need.
I really hope this was helpful! I’m sure there are even more things you can do with these Maps – let me know if you know any other cool tricks, and if you have any questions feel free to leave ’em in the comments and I’ll do my best to answer. Happy travels 🙂
I never knew you could do this with Google! I’m planning a trip to London in the fall and I have to try doing this! Thanks for sharing 🙂
You’re welcome! Glad it was helpful 🙂
Thank you for the tutorial! I’ve created custom maps before, but I didn’t understand how the layers work. Now I’m going to use them for different categories like you did- that’s so handy. I’m also going to Paris with my family over the summer and I’m excited to plan our trip!
I didn’t get the layers for a while too, but once I figured it out it became so useful. Have fun planning your Paris trip! xo
Thanks for this post! I love using custom Google maps to plan trips as well! I use different icons and then color-code for each day.
One thing I’ve run into is that it’s difficult to use custom maps as a resource when you’re actually on a trip, because they are difficult to access on mobile (I have an iPhone). I end up using custom maps for planning but they re-searching for every place that makes my itinerary in regular Google Maps on desktop and starring each place so that they appear in my Google Maps app as saved places. Do you have any suggestions?
One thing that a friend told me after she read the post is that you can download the map to your phone, and then put your phone in airplane mode and still use the map regularly, as you would with wifi. I was so glad to hear that because I was wondering the same – how to use the map on the go. To do it she said you pick an area on the map type “ok maps” into the search bar next to the magnifying glass, and it will download the whole map. She then put her phone in airplane mode and even though she wasn’t connected to wifi, the map still tracked her (the little blue bubble).
This is SO cool!!! Thank you for sharing.
You’re welcome, glad you found it helpful!
Your travel page alone has made your website my new favorite blog. Thank you so much for sharing all of these wonderful tips and tutorials!
That makes me so happy, thank you so much! Hope to have more travel content soon 🙂
Thank you for this! I’ve been saving places on my Google Maps as favorites but these tips will make it much better to use. I love the idea of Layering by day and turning off all but one.
Hi,
So random but I’m planning a trip to Paris & London with some of my girlfriends and was getting overwhelmed and decided I needed to make a map. I remember you posting this tutorial all those years ago and it has been so helpful. Thank you so much 🙂
That makes me so happy! Thanks for letting me know – I’m so glad it was helpful and I hope you have the best trip!